 Yesterday i went to see an exhibition of Theo Jansen's work. i had never heard of him before but have now so i thought i would share his work! he describes himself as a kinetic artist making huge wonderful beasts that move by wind power. the exhibition is at The Spacex in Exeter (15 May-3 July). one of the exciting things about the exhibition is that Theo will have one of his strandbeests on Exmouth Beech on 25-27 June this sounds like a must. it will also be in Exeter city centre 2-4July but i think the idea of seeing it on the beach sounds better to me. you can see a video of his work HERE.
 one of the textile artists i chose to study for Module 1 was Matthew Harris. when we visited Bristol some time ago we went to the Colston Hall specially to see Matthew's commission for the new hall. basically it's a 6 metre long drawing designed as a musical score which he has burnt into a wooden wall
.
it is typical that the day we chose to go coincided with a record fair with stalls and posters covering up most of the piece! however i was able to see bits.at last a 'textile' you can touch and it does feel lovely. many years ago when i was taught how to give presentations, i was always told you should never apologise for bad photos or even include them, however i DO apologise for the one above, it is a detail of the wall showing the burnt design in what appears to be a wall made of long thin matchsticks!!! i am looking forward to seeing what Matthew is exhibiting this week (as of tomorrow) at the Devon Guild of Craftsmen's show Collection.
so onwards and upwards i must get back to my own burning but of metals!
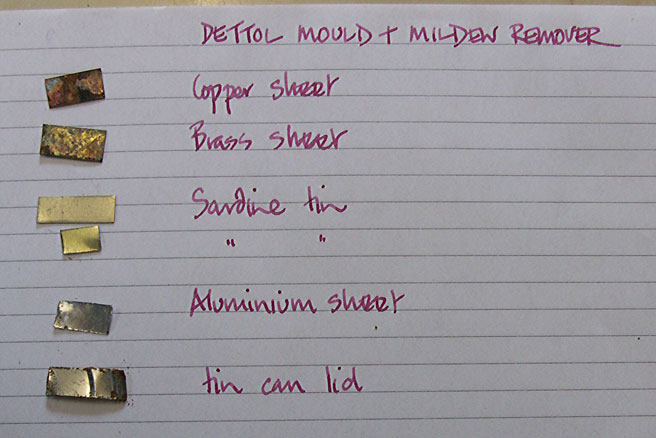
 for this part of the chapter i decided to break free and with my first sample went totally abstract. this one is 'automated' in as much as a straight stitch is automated and not hand sewn!!!! after all my sewing machine has to be all of thirty something years old. i trapped various bits of metal using a straight stitch. underneath is an Easter egg wrapper then a wonderful piece of blue fabric i found on the street followed by a piece of stainless steel mesh i burnt with a candle. inside two pleats are my good old favourite strips of tunnock tea cake wrapper followed by various bits of metal wire and fabric.
 2 is a piece of aluminium with punched numbers taken from a metal tag i again found on the street (my eyes tend to look down rather than up these days). the aluminium was scratched and paint rubbed into the surface then metallic pieces of tomato tube and fabric were trapped by the most exciting automated stitch my machine does!
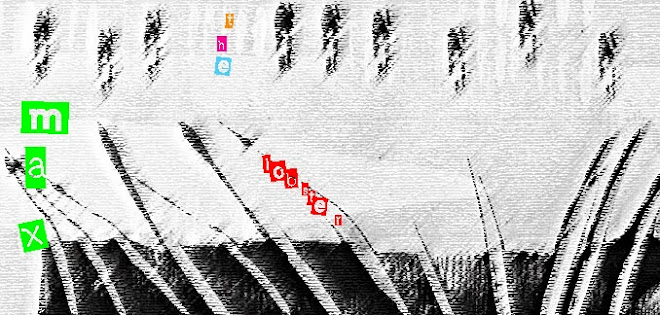
 and finally 3. strips of a Tizer drinks can worked with automated letters (Tizer) i used my sewing machine from work for this! the plan was to adhere the strips onto a water soluble paper with transfer adhesive then stitch repeated letters and then dissolve the paper. however the machine didn't like going over the strips so i placed a piece of tissue over the top and loosened the pressure on the foot. it didn't like doing this and there were numerous breaks and misforming of letters! afterwards i tore off the tissue and tore into the water soluble paper leaving some in place. i am actually very pleased with the result even though it wasn't what i had in mind to begin with! all 3 pieces are approximately A5 in size.


