
it's taken me a long time to do this chapter, can't say its been my favourite, till i got to the 'Resolved' pieces!! any way here goes.
the idea was to make lace like structures by applying 'bits' of things to an adhesive layer, i used a 'Bonda web' which i had got from Whaleys. my first piece i sandwiched between adhesive ( sample 3 ) but then i decided it worked just as well on a single layer.
Note Siân the scale!
 |
| these are left over scraps of japanese paper i had inkjet printed on |
 |
| this sample i painted the adhesive layer and used old 'used' bits of sellotape i had taken off the back of some old photos it had that lovely old yellowness and had lost its stick |
 |
| offcuts of thread |
 |
 | ||
| for this piece i coloured the adhesive with liquid graphite and stuck black plastic pieces i had removed from a piece in Chapter 8. it was then attached to a sample from an earlier chapter |
Chapter 10
 |
| Nylon layer with bonded silver leaf, rusted plastic and garden fleece. |
Resolved Sample 1
 |
| using letters to create individual elements |
 |
| detail |
i was thinking about bonding more than just a few layers and wondered whether i could create real bulk. i was looking back on my sketchbook and thought of using this as inspiration, instead of going downwards i wanted to go up!
 |
| image on the right |
 |
| image created by bonding 36 layers (approx) of cotton organdie |
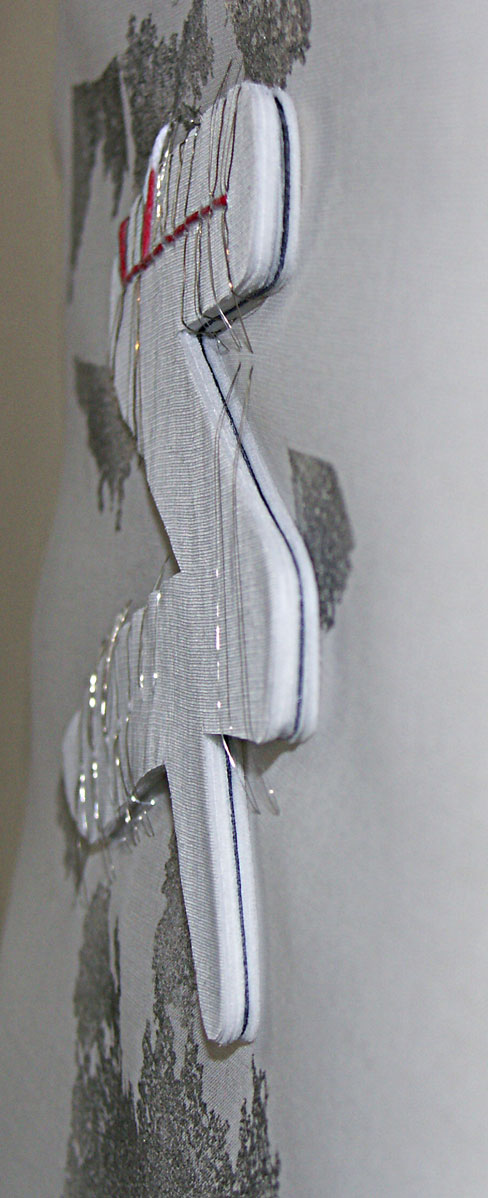 |
| it measures about 5mm deep |
my first layer was paper, the black line seen half way through, i then built up layers, it was very labour intensive but i am really pleased with the outcome. half way through i had had enough but didn't think it was thick enough so i came back to it and worked from the other side. i drilled the holes and attached it 'a la Gulliver' to a single layer of organdie. the bonda web on the background i coloured by spraying with spray paint. i think i would like to investigate this further when i have the time and patience!
Great ideas, lovely to study as usual.
ReplyDeleteI love your resolved sample, Ann, it's very contemporary and a brilliant move on from your earlier samples. I struggled with this one too, but oddly enough have a piece hanging in my window still that gets admired from time to time.
ReplyDeleteSuch an original resolved sample.
ReplyDeleteThanks everyone. Pleased that chapters over! But I am pleased with the last resolved sample and hope there's room for further exploration there.
ReplyDelete