i haven't really done much of this but made a start the other day with some old baby dresses that apparently i once wore! i can see that embroidery is really good for this project but i am hoping to get to draw some inner construction, labels and seams soon!
 i seem to be rather behind everyone else but here goes so far. i chose a feather as my object and contrary to my ideas with coffee which might be rather messy i used a tea bag of my husbands to colour the pages with dabs of gesso and masking tape masks. not sure i have followed your instructions to the letter Sian but the above is using graphite line and a bit of shadow with water to merge the line.
 i then chose a second feather using fine brush with added lettering
 Day ? using pencil with water and ink
.
so i am now off to put a strong lamp on as it is sooooo miserable out there
 while i was waiting for Sian to comment on the second part of Module 1, i went back to my sketchbook. i have been giving thought to layers and the different ways to achieve them, particularly since i went to an 'exhibition' as part of The Devon Open Studios. this exhibition called Polytek was held in a partly disused warehouse and showed the work of 'South West's finest graffiti writers and artists from Central Saint Martins' MA Fine Art course. in true graffiti style the day we went it was locked but the people before us had broken in, so we followed for an amazing experience (more photos to follow). the above window was taken in the building. i loved the images on the window and the hazy shadows of trees seen through it.
 i have often thought of transferring digital images to transparent fabric but never had the computer to do it until now and i'm sure there are many of you out there who have done this and think its old hat but not to me! so and due to lack of funds i went along to my local Waterstones to see what was out there in the way of useful instructions! i found 'From image to stitch' by Maggie Grey, it was excellent and i must apologise to Maggie for using the bookshop as a library but the library leaves a lot to be desired and the book will be on my wish list. So since then i've been experimenting with printing onto Japanese tissue and other thin papers, some based on the window and others on graffiti related splodges! basically the fine paper is stuck around the edge onto ordinary print paper with pritt stick, allowed to dry (i placed baking parchment on top and weighted them overnight)and voila! ready for the printer. the above piece is on a fine paper with lines of different densities.
 my husband threw a wobbly and said ooh! do be careful, so i was rather concerned when i put the above one in as it's quite textured but it turned out perfectly.
 with a rather interesting print left on the paper underneath.
 brush stroke on a Lokta type paper, but i bought it so long ago i can't remember what it is!
 again the striated paper
.
 a lilac Japanese paper with gilded bits in it.
 and finally just a basic compilation print using Photoshop.
 i then went back to my sketchbook and show a few that i am still working on, using watercolour, chalk and graphite.
 the above overlay on the left page is printed onto some Paperchase tissue.
 finally i printed an image of one of my stitched samples onto a map supplied to us by South West Water who were doing some work outside our house.i adapted it.needless to say i will be experimenting with fabric later!
 the above and following images are from my sketchbook. i have become interested in the 'detail' of graffiti such as the shape of brush strokes, marker pens, drips and layers visible through these marks. and have been trying to see the unusual and quirky such as the dorset buttons above influenced by the rivets in the door (above left).the white brush stroke is painted on acetate over torn tissue and watercolour wash.
 i love lace, and a number of years ago i learnt how to make bobbin lace, although i no longer make it i am still very influenced by and involved in lace on a daily basis! seeing the many graffiti tags out there i was drawn to how 'lace like' the structures are. above i have used a tag and repeated its image and cut-out a paper overlay.
 still with the lace cut-out this image above is a graphite rubbing on handmade paper (its amazing what you can do with old xmas cards) made over a thicker cut-out/stencil. the voids to the right were stencilled and shadows added to give a 3d effect.
  again using the same 'lace' image i layered various papers,stitched and then cut back to reveal lower layers.
 getting into layers i worked 5 pages as a series. based on the first image in this post i took the brushstroke theme and worked downwards and staggered the layers to reveal edges.
 the final layer, sequins was based on the flat surfaces produced by spray paint and how it can dazzle. some years ago ron arad chose various artworks to exhibit at the V&A one of which was a life size kitchen by liza lous completely covered in bugle beads, cereal, pots and pans kitchen sink, the works. it was amazing! perhaps i could do a whole wall in sequins!
 i have also been working with arrows and again layering to catch glimpses below. above burnt out arrows.
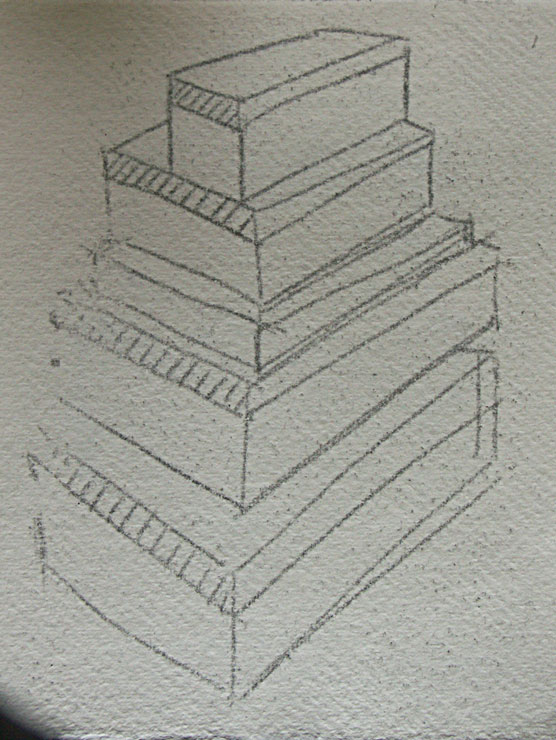
 finally, more layering but with stitch imitating 'tongue and groove' wood panelling. going back to lace, last year brugge put on a city wide exhibition called 'the face of lace' concentrating on artists/craftspeople who use the influence and structure of lace to create new, modern works such as wire fences, wallpaper, chairs, lighting etc.

 i chose this month to work with a fig leaf and only really started this half term. we have a fig tree in our garden which usually produces copious amounts of figs which are truly scrumptious. i have always been amazed at the size of the leaves! so first drawing using a basic pencil and outline.
  then ink brush and more pencil, the one on the right i didn't look at the page and it was done quite quickly hence the overlaps
 then going on to wet paper, water soluble crayon and more quink!
 then i started playing around with the veins.
 onto colour with koh i nor and looking at small details, i love the shape of the 'u' between the lobes of the leaf
 the leaf is now beginning to curl at the edges - i should really take a picture of it.
 above working quickly and again not looking at the page
 i have now got obsessed with the veins, making barren Christmas trees!
 still looking at patterns within the leaf and using it to print with.